Monday, December 23, 2013

Detail


Those paintings by artists who paint every blade of grass are often less complete than those who can depict many blades of grass by using one large well placed and well handled brush stroke. It takes very little skill to paint one blade of grass at a time. It takes a real master can create fields with just a few brush marks if they are handled just right. Look at John Singer Sargents work as an example.
The painting on the left is one of mine with very little detail but the painting was much stronger because of it.

Sunday Afternoon Painting

Sunday is a day when a few friends get together to do some plein air painting. I set up one camera to shot this short time lapse video and using only three colors on my palette plus white. Ultramarine Blue, Indian Yellow, and Alizarin Crimson. When using just three colors it was important that they were all transparent colors. If they had not been transparent the rich dark tones would not have been possible.


Painting at Little Big Horn

Here's an example of working outside on a day that was extremely hot and uncomfortable. I almost didn't take the time to paint but at the last moment decided to do a small piece which ended up as quite a special experience.


Thursday, December 19, 2013

The worth of a painting?

There was a time when artists work was worth more when they were dead.

Now it looks like it's worth more when you make someone else dead.


Wednesday, November 06, 2013

Creating a mood

Before returning to Florida, Sarah and I spent a few weeks in our Flat Rock, North Carolina studio after returning from filming new episodes of our PBS television series "Painting and Travel" in Montana and Wyoming. It had been a wet summer in the North Carolina mountains and the greenery was quite intense. I tried to get the feel of that dampness in this new painting.
Roger


I started with a 16x20" Masonite board and sketched the house in charcoal.


Then I began to lay in the large shapes and dark values and also added a warm sky with very little color to represent the overcast quality of the day.


More colors were added to begin the block in of the house and roof with a combination of warm and cool colors to give a subtle indication of where the light was coming from.


Here I began to refine the painting and tighten up the details in the trees by adding negative areas. There was little detail in the grassy areas and I wanted to leave that portion simple so as to bring more attention to the small details in the house. I used my Tri-Art acrylic paints from the Jack Richeson Company. I believe a combination of Chromium Oxide green and various warm colors like burnt sienna and reds were used to get the darker grass colors. Then a bit of Cadmium yellow light was used in the grass to get a warmer patch of diffused sunlight in the finished piece. The acrylics have a great advantage of being to scumble over areas of dry paint as opposed to oils where those colors would mix.


This is the reference photo I used for the painting taken on my iPhone.


Here's the finished painting.

Saturday, July 13, 2013

Acrylics that feel and look more like oils

These Tri-Art paints work and feel much like oils. I like and use these paints on many of my paintings.
I have found however that these paints will dry up in the tubes much quicker than most other brands. Other comments I have gotten about the paints is that many people don't like the rather flimsy construction of the tubes themselves. Despite these criticisms I'm still a fan of these paints.


Friday, July 12, 2013

Working from photos vs plein air painting


This short video talks about the benefits of painting on location as opposed to painting in the studio especially when it comes to working with photographs.
The plein air painting was done just a block from our studio here in St. Augustine, Florida.


Sunday, June 16, 2013

Time Lapse - Painting in acrylics


 Here's a short time lapse of Roger painting this tunnel from a photo.


Sunday, May 05, 2013

Painting in the Golden Hour

What is the golden hour? Put generally, it's the first hour after sunrise and the last hour before sunset, the time of day when the sun is lowest in the sky making shadows soft and color temperatures warm. The light that the sun gives us during the golden hour gives landscapes a rich hue not found during midday.
There is an app for scheduling a painting session around the golden hour called Golden Light. It uses your location and global weather data to tell you exactly what time the golden hour begins and ends.


After opening Golden Light for the first time, it will ask you for permission to use your location. If you agree, the Golden Light map will center on your location and you'll get the golden hour times right away. If you disagree, you'll have to choose your location manually. To select a future date to base your painting schedule on, tap the calendar icon in the upper right corner.
Golden Light is free and works on an iPhone or iPad. Type in "Golden Light" in your iphone app store icon on your phone to find app.
Similiar apps are available on the web for android phones.
Thanks to videomaker.com where I found this information.

Friday, March 22, 2013

Using Masonite and an alternative


A question I am frequently asked is about painting on Masonite board. Here's a short video about using and preparing boards for painting and an alternative to Masonite called Panel Board.


Wednesday, March 20, 2013

Painting Historic Places and Tangents

One of the historic sections of St. Augustine, Florida is called Lincolnville. Sunday morning I gathered up my easel and paints and spent the morning there painting the Bethel Missionary Baptist Church as the church service was taking place. Here are a few steps that were involved.


I was careful to get as accurate a drawing as I could for this painting since it's an historic landmark.

I began with this charcoal drawing on an 11x14" piece of Masonite.

Roughly laying in the colors to establish a base from which to build.

At this point I had all the shapes in place but there was one problem that I would have changed had I noticed it earlier and that is the tangent where the top of the roof on the white building in the foreground intersected with the sloping roof on the building behind it. I felt it was too late to change everything so I had to work carefully as I went along to be sure that the roof on the second building wasn't confused as a roof on the foreground building.

As you can see in the photograph, that tangent causes some confusion. Things like this are so much more evident in a photo or a painting than they are in real life that it is sometimes difficult to spot them when painting on location. I think I finally worked it out well enough in the finished painting but it was a bit of a challenge. I completed most of the painting in the field but put some finishing touches on it with oils back in the studio.


Friday, March 15, 2013

Don't underestimate the value of a nice frame on your paintings. A frame makes a statement that the painting is finished and an important looking frame makes the painting more important.


Painting progression

Sarah and I spent the afternoon at the Vilano Beach boat launching area near St. Augustine, Florida. I chose the back of this bait house mainly because I liked the palms. Here's the progression of the painting.

This was a 9x12" masonite board. I used charcoal to lay out the large areas.

I have found charcoal to be really useful in getting started because I can easily visualize the large shapes. In the first image (above) I thought the house was too small for the composition and with charcoal it can easily be wiped off for a clean start. Very benificial.

I began with the large shapes and wasn't at all concerned with details at this point but I was concerned with the brushwork, much of which can remain and actually show up in the finished painting.

The house was actually a green color but I decided to keep it in the yellow ranges to maintain more harmony within the overall painting. I also extended the roof so more of it was showing and wanted to make it a tin roof instead of shingles. I wasn't at all bound to painting exactly what I was seeing since it was not an historic representation.

Then the sky was placed in the painting along with a few subtle clouds. Putting the sky in at this point allows me to put negative areas in those palms later and by not putting the sky in first I was able to keep those dark transparent colors on the dark palm tree areas. The perspective would have to be attended to on the building as well as it wasn't quite right.

Refinements began. Opaque colors were applied over the original dark colors of the palms.

The side of the buiding bothered me. I didn't want to add any of the railings I saw on the building but in the final painting I added some tall poles just to break up that area.


Come to St. Augustine if you have a chance. It's a great place to paint.

Thursday, February 21, 2013

Acrylics vs Oils

This painting of the Castillo De San Marcos fort here in St. Augustine, Florida was painted in acrylics on canvas. People often tell me they prefer to purchase oil paintings instead of acrylics. One reason is because many acrylics look as if they are done with colors that are too vivid and unnatural looking. That occurs because drying is so fast they don't get blended into one another with the ease oils do and they can end up rather garish.
To avoid this I constantly put a fine mist of water from a spray bottle onto the canvas so the colors can be blended before drying occurs. A heavy layer of paint will also help it dry slower.
One advantage of acrylics is that textures can be more easily made because once the acrylics dry, consecutive layers can be placed over it as a wash, splattered, and so on without it mixing into one flat tone as oils would. The pace of painting can be kept up without waiting days for drying to take place. The painting below is an example of the variety of textures that can be made in one sitting.


Here is what artist Jay Babina of Connecticut said on the subject.
I paint with both oils and acrylic. I believe that acrylic attracts many beginner artist because of the easy water clean-up and no fumes etc. I think that a greater percentage of this criticism is because of the lack of color and observation that comes with training and experience. There's just less highly accomplished acrylic painters vs. oil. Also, oil painters are constantly painting with contaminated pallets. The brushes are never clean and there's a greying down of pigments that is occurring constantly. Whereas with Acrylic, it's just easier to clean your brush thoroughly with a few seconds in the water. The mixing on the canvas of an oil painting goes on for a long time since it's always wet (for quite a while). 
I often go to the library and take out the endless array of art books especially in the winter and rarely do you see acrylic painters in the books who are able to subtly use color. It seems to attract loud painters and very stylistic painters.

Thursday, February 14, 2013

Plein Air painting in late afternoon

Every Sunday afternoon several artist friends get together here in historic St. Augustine, Florida for a couple hours of plein air painting.
Yesterday we visited The Mission of Nombre de Dios which traces its origins to the founding of America’s oldest city, in 1565. On September 8, 1565, Pedro Menendez de Aviles landed and proclaimed this site for Spain and the Church. It was on these grounds that Fr. Lopez would celebrate the first parish Mass and begin the work at America’s first Mission. The statue I painted is St. Francis of Assisi, the patron saint of animals and the ecology.
I used acrylics on this 8x10" board and my palette consisted of 4 colors. Ultramarine Blue, Alizarin Crimson, Indian Yellow, and Cad Yellow Light and of course white. The photo below shows the painting partially blocked in. The values were all close so I would have to rely on the nice highlights that rimmed around the back of the figure to bring it to life. The hedge in the foreground was a cool green in reality but I warmed it from what it actually was because I wanted to bring it forward so it would not recede into the background where it might get lost among the other greenery.


..
The painting was finished by adding more negative areas in the trees and adding the lake in the background which gave it a nice touch of additional color from the otherwise warm late afternoon glow.

Thursday, January 03, 2013

Painting Sunsets

Here is a question emailed to me and I thought I'd answer it here. It's from Lynn in Sikeston, MO.

Lynn says, "I have a question on sunset paintings.  Each evening on my way home from work, I watch these beautiful sunsets with vivid colors.  Silhouetted against the sky, the trees and buildings seem very dark, but I cannot find the color answer to paint them.  While they appear very dark, painted dark looks very harsh and unbelievable.  Any advice?"
The subject of sunsets is often selected by students when I do workshops. Generally, I'd say stay away from doing them but if tackling the subject I try and remember a few things.

1. Try and make notes of color either mental or better yet with a very quick thumbnail sketch on location to record the colors in the sky and use those color notes when doing the painting.

2. Remember that when using a photograph of a sunset, the camera will not see even a small portion of the colors that the eye can see in real life especially when looking at a high contrast subject such as a sunset. The photo will either wash out the sky colors and leave you with the land portion exposed correctly OR if the camera is exposed for the sky, the photo will leave you with a black landscape. Chances are you aren't going to get a good exposure on the sky and the land in one shot. This puts any artist at a disadvantage when painting from a photo.

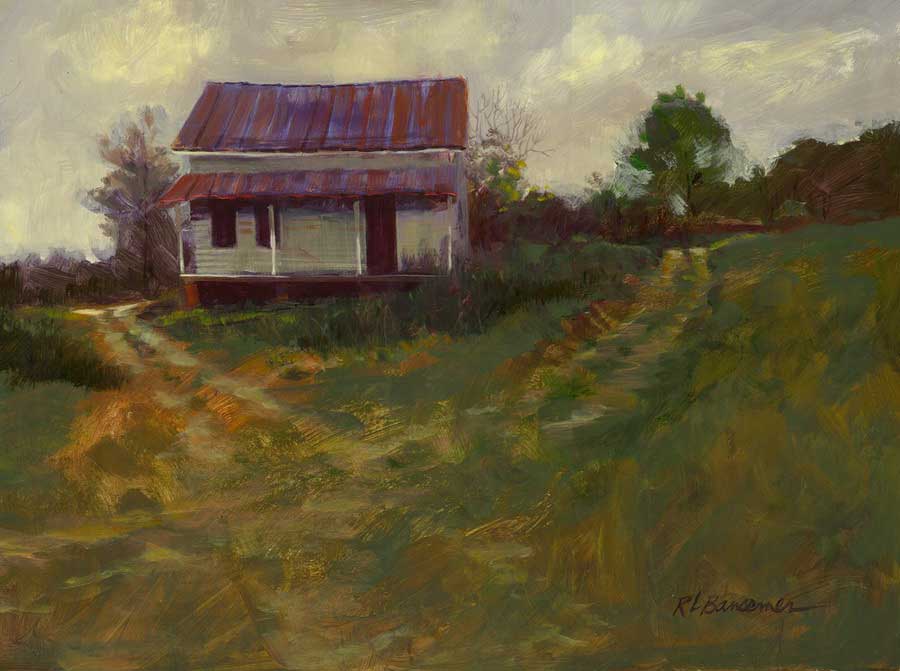
3. I never use black on a sunset painting. A sunset painting is all about color and black will kill it. I use a mix of transparent colors such as alizarin crimson and thalo blue or ultramarine blue to give a very dark color. I stay away from using any opaque colors when trying to make these darks or at least I might use them very sparingly. For instance maybe a small touch of burnt sienna in the dark areas as in the painting below. When I use black it is always to make a color greyer and not necessarily darker.

4. Remember the landscape becomes very secondary in most sunset paintings and usually ends up as silhouette. Detail usually becomes soft.


TO VIEW OUR LIST OF INSTRUCTIONAL DVD'S CLICK HERE.
TO SEE MORE OF THESE "FLORIDA WILDERNESS" PAINTINGS CLICK HERE.

5. Consider doing a sunset painting before the last minute of sunset when the landscape still has more light on it. Here's an example of that.

6. I try and stay away from bright colors when painting a landscape. Maybe a touch or two of a pure color is fine but using too many pure colors will give the painting a false and harsh look like the one below.
7. Remember that a sunset painting needs more to it than a horizontal line across the center and some clouds and sun at the top half. It needs to have a subject and just dividing the picture up into those two areas like the photo above leaves the viewer with little or no real interest or subject matter to enjoy. There are always lots of people at the beach at sunset taking such photos but a good photo or painting needs more than a split screen of sky and water. It's also not a good idea to divide the canvas right in the middle.